Guides
SHARE
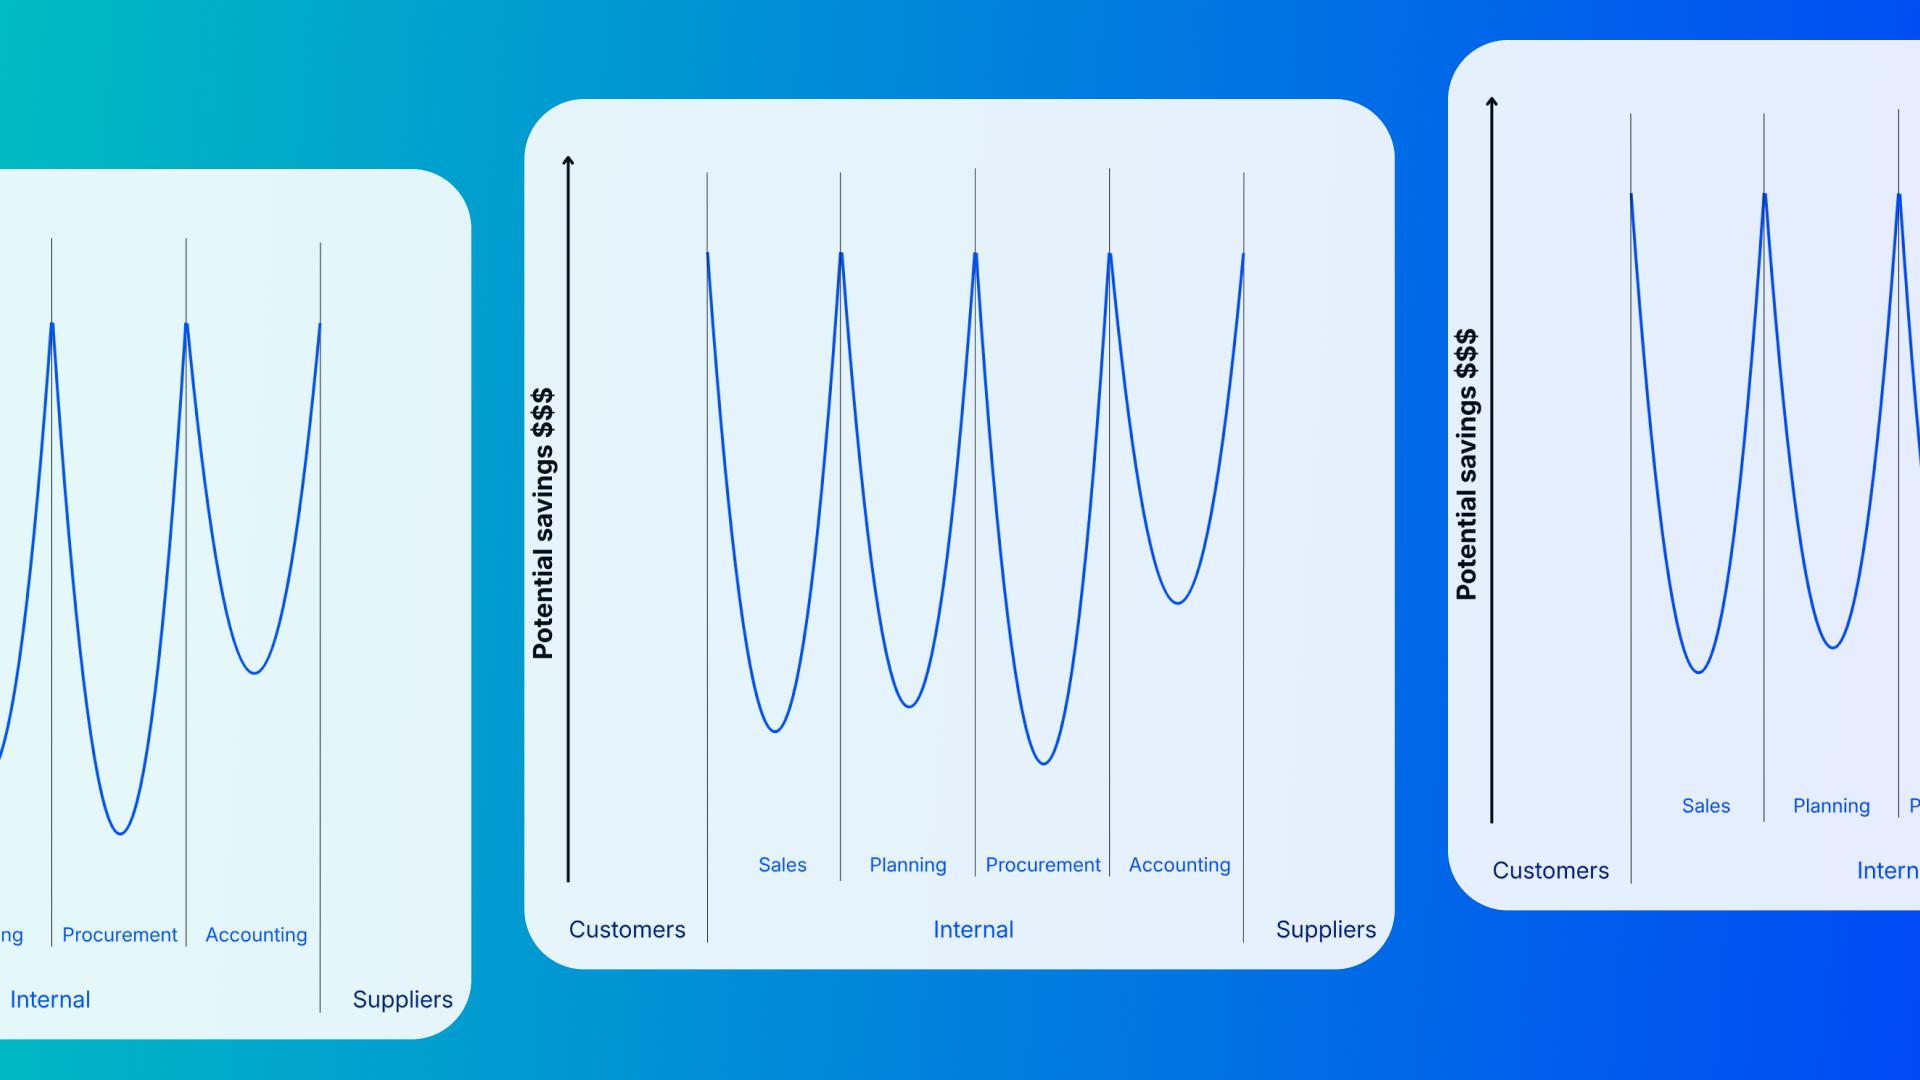
4 easy steps to automate non-EDI demand forecasts
Scattered PDFs and messy spreadsheets make demand forecasting unreliable. This guide shows how Nordoon’s AI Agents turn non-EDI data into structured, validated forecasts. Automatically mapped, matched, and ready for planning.

April 18, 2025
TIME TO READ:
MINUTES